While I was traveling last month, my {{MODEL}} suddenly overheated during a video call and shut itself off. At first, I thought it just needed to cool down, but after several hours it still wouldn't power back on. A local repair shop checked it and claimed the power management chip had failed, offering to fix it for $220, a price that felt unreasonable considering the phone had never given me trouble before. Instead of agreeing to the repair, I decided to take matters into my own hands and see whether I could bring it back to life myself. What followed was a mix of frustration, discovery, and a surprising amount of satisfaction.
The tools I used
I didn't need a professional workshop, just a basic smartphone repair toolkit. The essentials included a set of precision screwdrivers, a plastic opening pick to avoid damaging the frame, tweezers for handling the small components, and a multimeter to test the circuitry. A soldering iron helped remove the faulty chip, though with enough patience, even a budget model gets the job done.

Luckily, a friend of mine who works at the company shared the service manual with me, complete with schematics. The troubleshooting guide outlined a clear five-step process for identifying the faulty components. It involved removing a few screws, disconnecting several connectors, and separating specific parts. Everything was clearly explained in the manual. Using the multimeter, I tested multiple components according to the measurement points indicated in the guide. In the end, the schematics were extremely helpful in pinpointing the exact part that needed replacement, and it turned out to be the very chip the repair shop had mentioned.
I'm sharing this repair manual for free. I just ask that you complete a short offer, it helps me keep the blog going. Thanks!
Please leave a comment after downloading, it's always a pleasure to know my work has helped someone!
How I brought it back to life
This beginner-friendly video was a huge help when I first started soldering!

- Extracting the Motherboard (page 29 in the manual above) - Using the service manual, I carefully followed the step-by-step guide to remove the motherboard, ensuring all screws, connectors, and attached components were properly handled.
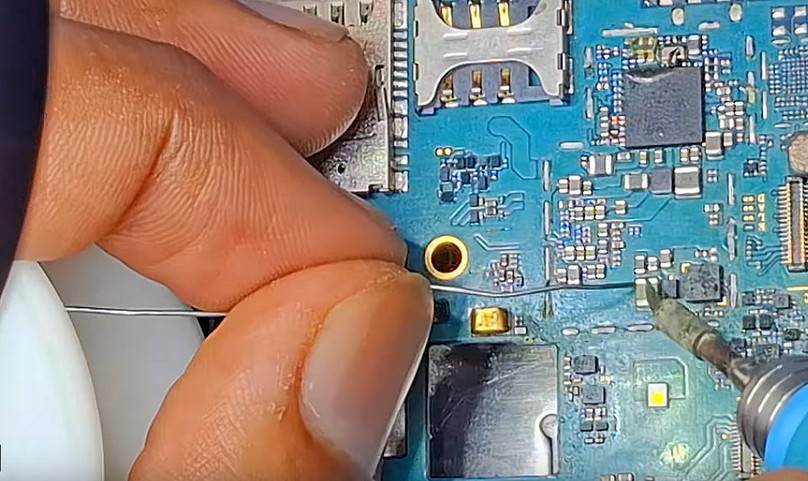
- Diagnosing the Issue - With a multimeter, I tested various components at the designated measure points, including VIN, VCC, GND, and MOSFET drain-source junctions, to locate the faulty part.
- Identifying the Failed Component - The schematics helped me trace the issue to the specific chip.
- Replacing the Faulty Component - I sourced a replacement component online for just a few dollars, desoldered the damaged part, and carefully soldered the new one in place.
- Reassembly & Testing - After putting everything back together, I powered the device on and success! It worked perfectly, saving me hundreds of dollars.
Update: 6 Months Later
It's been six months since I repaired my motherboard, and everything is still working flawlessly! No overheating, no instability just a fully functional device. This repair turned out to be a great success, and I'm even more confident in tackling future hardware fixes on my own.
Last Articles


About
I'm a versatile developer who loves tinkering with code and sharing insights on software engineering, web development, and occasional design. My playground includes PHP, Java, JavaScript, CSS, and SQL, plus whatever new tech catches my interest. Need a hand with a project? Let's collaborate! Reach out, and let's build something great together.


Last Comments
(You'll be able to see all comments and post one after downloading the manual)